Showing posts with label authentique. Show all posts

Tuesday, July 28, 2015

Art Journal Page Using Authentique "Playful" Paper Collection

It's Susan Tidwell here to share another project I created with the Authentique "Playful" paper collection I received in my LBH Media Team packet this month. These papers were so fun and colorful and a joy to work with - and, they are available at the LBH!


I decided to use these papers on my weekly Documented Life Project art journal spread for Week 25 (June 20).  The Documented Life Project is a year-long art journal/planner challenge conceived by five talented artists and is in it's second year. You can read more about it here if you are interested. There is a different overall theme each month and every week an art challenge and journal prompt are issued. The challenge is to use these as inspiration for your weekly journal page.

The theme for June was Travel Journaling. The June 20 art challenge was to be inspired by your hometown; the journal prompt was "there's no place like home."  This is the page I created for that week.


I had just enough Authentique papers left over from my previous projects to make the five houses which represent the five places I've lived. I was born in Vermont and then, once married, moved to Missouri then California and New Mexico before finally arriving in Texas in 1999.  I also used the hexagonal chipboard pieces for two windows in the houses. I computer-generated the state names as well as the title: "Wherever we are together, that is home."

The sky and grass backgrounds were painted with Dylusions and Dina Wakley paints, mostly scraped on with an old gift card - my favorite technique for applying paints! I also used stamps with black Archival ink and white paint on a piece of shelf liner to create the textures in the background.

For the week's "calendar" area I painted a large scalloped border, doodled smaller scallops and cut up an old calendar for the numbers. I used a tiny day stamp from Maya Road for the days and documented each day with a permanent marker.

I am really enjoying this project and am happy to say that I have been able to keep up with each week. It is a great way to document this year in an artsy way.  If anyone is interested in seeing past weeks' spreads, you can find them on my blog here: www.susan-artfulmusings.blogspot.com

Friday, July 10, 2015

Authentique: Classique Beauty Assemblage


Authentique:  Classique Beauty


Have you been seeing assemblage pieces everywhere?.... I have.  It's left me inspired to try my own.  This was a fun project using Authentique : Classique Beauty and a few odds and ends from around the house.  


This project requires....

Authentique : Classique Beauty :Beauty One, Beauty Eleven, Beauty Six
24 gauge wire, or something close to
Glass Jar (this one was purchased from Dollar Tree because it did not have writing)
Styrofoam
Peat Moss
Yellow and Black marker
Wink of Stella in Gold
Queen and Co. Trendy Tape : Vintage Ephemera 
Yellow tulle trim
Rhinestone Trim
White Doily
Glue Gun
Buttons, flowers, paperclips in coordinating colors

The first step was cutting out the image and coloring a few places to tie in the yellow...


Go over the marker/pencil with a touch of the Gold, Wink of Stella pen and attach the other parts of the image.  I let the size of the jar dictate how large to make it.  Cut out a triangle to make a party hat.  I just kept trimming until the proportion seemed right.  Add some embellishments to her hat.  


So nothing holds this portion in place but the jar itself, I used glue dots so I could adjust this until it stayed where I wanted.  


Put some Styrofoam in the lid, doesn't need to be pretty.  It will not be seen.


Add some peat moss to cover the foam, don't worry about fit now-  it gets a haircut when everything is in place. 


Make some stick pins with a pencil and wire.  Wrap around the pencil about 3 times and bend at a 90 degree angle.  Just slide the paper through the loops and it should hold nicely.  


Add wire to the large paper clip to make it stand up tall.


Assemble a flower with buttons, sequins and rhinestone with some wire between the button and flower. Butterflies and arrows were done the same way.  


Now stick things these things to the foam, trimming and adjusting heights.


Slip the jar on top of it all and trim the pieces poking out so that you can get the lid to stay on.  


Add some washi tape to the jars rim, finish off with yellow tulle trim, some rhinestones and a doily.  


Cut an approximate circle to cover the top, distress the edges slightly.


Stack some buttons and glue together with hot glue to make a faux finial.


Attach to the top.


After making a few projects do you find yourself with some great scraps?  Between vetoed ideas and paper remnants... there's always a few projects to whip together. 


This was pulled together with scraps, stamps and some black and yellow ink.  Stamped some butterflies, inked them up, trimmed them out and glued it all together.  


Use your scraps, use the paper!  Paper hoarding gets us nowhere!  ha,  my excuse is I get to buy more if I use it all.  

Thanks for checking out my projects!

Lindsey Banner


Saturday, June 27, 2015

"Today Happens Only Once" Minibook Tutorial


"Today Happens Only Once" Minibook
designed by Susan Tidwell


Susan Tidwell here from the LBH Media Team for a minibook tutorial using the fabulous "Playful" paper line from Authentique. The fun color palette of orange, turquoise, navy and gray make these papers perfect for summer projects!

I have created a mini "squash" book which is also called a "dragon" book because of it's meandering folds. This book can be made larger as well - you just need to start with three square base pages whatever size you desire.

Let's get started.

Supply List

(2) 4"x4" pieces of corrugated cardboard
(3) 8"x8" cardstock (I used navy)
(1) pkg. Queen & Co. "Checkers" (orange gingham "button" stickers)
1/2 yard blue and white baker's twine
2" red satin ribbon
5" thin orange twine
blue ink - Quick Quotes Chalk Ink "Blue Moon"
coral ink - Distress Ink "Abandoned Coral"
2 small pieces velcro
liquid adhesive or tape runner
white Uniball Signo gel pen
1/8 or 1/16" hole punch
Scoring tool and bone folder
scrap of washi tape
optional: star and heart punches, stapler


Instructions

1. Score and fold each square piece of yardstick in half. Open up and score and fold in half in the other direction. This will make a cross ( + ) on each sheet.  Score and fold each sheet once again but diagonally from one corner to the opposite corner.


2.  Grasp the corners with the diagonal folds and push the diagonals in to collapse the sheet into a square. Press all folds well. Repeat for all three.


3. Unfold the squares and adhere together overlapping the lower right quadrant of the first piece with the upper left quadrant of the second piece. Repeat with the third piece, gluing the upper left quadrant to the lower right quadrant of the second piece. When all three pieces have been attached, collapse/"squash" into a square book.


4. Tear paper off one side of each of the corrugated cardboard pieces exposing the ridges. Ink edges and ridges with blue ink. Glue one piece to the front cover and one to the back cover.

5. Cut 3 3/4" x 3 3/4" square pieces from the assorted pattern pieces. Some of these pieces will then be cut in half diagonally to form triangles for some of the pages in the book. Ink all edges with coral ink.

6. Open book and lay flat. Start adhering papers to cardstock pages. Mix up the patterns and colors for interest. I left some pages blank and later decorated with scraps, the cardstock diecuts and journal cards. Below you can see one "side" of the opened book decorated.


7. Turn over and repeat for second side.


8.  Decorate pages as desired. I added some punched hearts and stars and some of the yardstick diets here and there. Add Glossy Accents over these. I also doodled with a white pen.


9. To decorate the cover, I used one of the journal cards, cut it down slightly and inked the edges. I added for checkered "buttons" in the corners and looped and glued baker's twine around to form a frame, knotting it in the upper right corner. The tiny tag is cut from one of the journal cards. I cut it into a tag shape, punched a hole in the top and threaded orange twine through the hole. It is attached around the upper right button as well.


10.  Since the book is fat and didn't want to stay closed very well, I made a closure out of one of the cardstock embellishments. I cut the strip in half and glued one end of each piece under the right and left edges of the cover panel. I added tiny pieces of velcro to the ends and then wrapped them to the back, glueing the other side of the velcro pieces to the back. (See below.)


 11. Add some fun photos and you are finished! Here is another photo showing how the little book "meanders."


I hope you enjoyed my little minibook project! All supplies can be found either in-house at The Little Blue House or on our website: www.thelittlebluehouseonline.com
 

HAPPY CREATING THIS SUMMER!

Susan
-----------------------------------------------------------------------------------------

Thanks Susan for that great tutorial! I love making these types of mini-books--- these books make perfect gifts for friends and family and can hold sooo many photos!!!
 
I  wanted to share with you a workshop coming up with Susan Tidwell at The Little Blue House!
If you love the color theme of the Authentique- Playful Collection you will love these
"Happy Houses" designed by Susan T!
This is a fun mixed media workshop coming up on July 7th (Tuesday) Susan is offering a morning and evening workshop! Visit the Workshops Page on our Website for all the Details on this upcoming class! www.thelittlebluehouseonline.com
 
Have a great weekend,
Kristyn

Monday, May 4, 2015

Happy National Scrapbook Day!!!! THANKS TO YOU!!!!!

Big THANK YOU to everyone who celebrated NSD Week
with us at The Little Blue House!
We hope you had a blast creating with us! We truly have the BEST Customers Ever!!!


Please let our sponsors know how much you loved their prizes and give-aways!! Here is a list of all the vendors with links to their facebook pages and blogs!!
-NSD Vendor Sponsors-

-Fancy Pants Designs-

-Reverse Confetti-

-Simple Stories-
-American Crafts-


-Echo Park-
-Bella Blvd-
-Jillibean Soup-

-Maya Road-

-Authentique-
-Queen & Co.-

Food &  Refreshments Sponsors
We hope you enjoyed all the yummy goodies we served at the NSD Create-a-thon. 
Mi Pueblo Mexican Restaurant
Website:  http://chavezfoods.com/

Poppin Shop
Website: http://thepoppinshop.com/

Cupcake Loco
Website: http://cupcakeloco.com/
Thank you for spending National Scrapbook Day with
The Little Blue House! :)
Keep Creating,
Miss Tracy & the LBH Gals

Tuesday, February 17, 2015

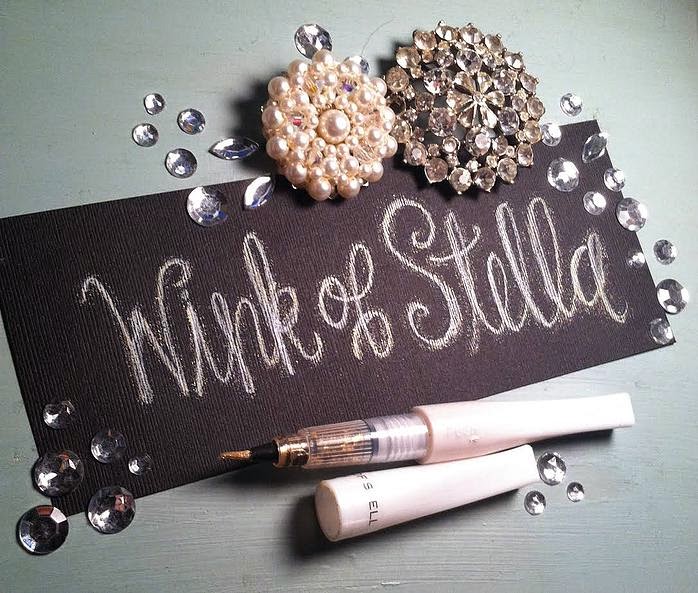
Product Review: Wink of Stella Glitter Brushes Part 1

Have you ever used a Wink of Stella Glitter Brush?
If you have been to the LBH lately we have been featuring these brushes on lots of projects and make & takes!
We challenged our LBH Media Team this month and sent them all a Wink of Stella Glitter Brush.....
Keep reading to find out how they used their Wink of Stella Glitter Brush and what they thought about this new glittery tool!
--------------------------------------------------------------------------------------------------------------------
Lindsey Banner's Wink of Stella Review
This Wink of Stella brush pen works beautifully.  I received the color Gold in my Media team Kit!
I will say we started on a rough foot, to get it started you have to remove the black ring and when is says gently squeeze- squeeze it even more gently.Even with the initial flood I created, once I wiped it back and forth a few times I was ready to go.I tried some script handwriting, doodles, lines, dots, just about everything and it was wonderful. 
The brush tip allows you to create fine lines and broad strokes without a masterful know
ledge of calligraphy.  It’s very easy to use and the effect is unmatched by any product I have used.
I have the gold color and it’s sparkle is terrific.  With one stroke it’s a light sparkle, with multiple passes its bold and tints the paper a fantastic shimmering yellow-gold tone.   It works amazing on dark papers, used on black cardstock the effect is gorgeous.  I’ve used this brush pen on just about everything I make lately. A touch here and there, a few dots or outlines- it creates so much interest and a remarkable shadow effect. 
​ In this application I colored over the Authentique, Crush- Impression paper. 
It’s a white-ish paper with some ruled lines in it.  This was done with about 3 passes and the color is amazing.  Maybe you also notice I made a few dashes on the bow to create a shadow effect.
----------------------------------------------------------------------------------------------------------------
Vicki Chrisman's Wink of Stella Review

Hi everyone, Vicki here to share a card I made with some shimmery accents added with my Wink Of Stella Glitter brush. I received the color Silver in my Media Kit! I used my Wink of Stella Glitter brush to highlight the edge around the printed saying I used on my card, also on the little diamond at the top and to go over the letters themselves.  I was so amazed at how easy the brush was to use. The fine tip made even the smallest areas easy to fill and finest lines easy to trace over.  The fact that you have this constant flow without having to dip the brush tip or re prime, make using this a dream.  I only wish the beautiful results were easier to capture with the camera, so that I could show off the shimmery look of the finished project to you a better.  Hopefully in the last photo where I tipped the card to the light you can at least see the shimmer a bit, but it still doesn’t do justice to how it looks in real life.  A beautiful added touch that really finishes of  a project.

 ------------------------------------------------------------------------------------------------------------------

Nadine Carlier's Wink of Stella Review
Nadine used her Wink of Stella Brush to add the finishing touches on her Layout.
I created some flowers onto the background using a Wink of Stella Glitter Brush in Gold.
To create the flowers, I pressed the side of the brush onto the paper to make a petal. Repeated it 5-6 times in a circle to create the flower. Depending on how much of the tip you press down on its side will determine how big your flower is. I suggest practicing a few times on a scrap piece of paper before trying it on your layout. This was the 1st time I have ever used the WOS and I absolutely loved it. I love how smoothly they go on and the amount of glitter that shows up on the paper is stunning. I will definitely be getting more of these in other colors!

--------------------------------------------------------------------------------------------------------------------
Angi Barrs' Wink of Stella Review
I love making party favors and used the kit to make mini popcorn buckets.
I used small glass mason jars and dressed them up with Pink Paislee's Bella Rouge collection.
I decorated the front of the jars by using wood pieces and a heart chipboard from the same Pink Paislee collection. I used the Wink of Stella brush (Silver) to color the wood piece. After it dried I added on an additional embellishment for a layered effect. The brushes are a great way to jazz up your embellishments. It works great on a variety of surfaces.
All in all, I give the brushes a thumbs up! They are quick, easy, and did not leave a mess behind.
--------------------------------------------------------------------------------------------------------------------
Susan Tidwell's Wink of Stella Review

This is Susan Tidwell with a review of the Wink of Stella Brushes. Let's just say they are awesome and I LOVE them! They give beautiful shimmer to your projects and are versatile and easy to use. Be sure to keep the packaging when you first open the marker and follow the easy but explicit directions for opening and priming it! Below I share several different techniques with the Wink of Stella (WOS) Red Glitter Brush I received in my LBH media team kit this month.

 I created this layout using the beautiful "Crush" paper collection from Authentique. This paper collection is Valentine and heart-themed but the papers worked very well for a baby layout!
(This layout was an exercise in limited supplies. My daughter delivered her baby 5 weeks early and as I was preparing to leave home for an undetermined amount of time I grabbed my media team kit and a few supplies hoping to be able to create while I was out of town.)


 I used the WOS on the handcut heart shape to make the light pink card stock darker to coordinate better with the patterned papers. First I colored the heart with Bubble Gum gelato and wiped with a baby wipe to smooth out the texture. I colored over this with the WOS to deepen the color and add shimmer.  I also used the marker to color some of the hearts in the patterned paper pieces and to edge the "Sweet" title I had cut from one of the papers.
 

I also used the WOS to color directly on a stamp which I stamped randomly in the background.
This adds some pretty shimmer to the stamped images. It's very important to clean the stamp immediately to remove the marker before it dries.These wonderful markers are such fun to use and come in a range of scrumptious colors. They are available at the Little Blue House.
I would love to see what you do with them!


These Wink of Stella Glitter Brushes jazz up any project you are working on! You can now purchase every color of
Wink of Stella at the LBH or in our Online Store!

Our team had sooo much fun creating with this product that we are featuring another whole day on the Blog for this Product Review!
Make sure and subscribe to the Blog & follow along tomorrow with more great tips and inspiration using these Wink of Stella Glitter Brushes!!