Showing posts with label Rhonda Merry. Show all posts

Monday, September 19, 2016

Front Porch Fun Day with Rhonda Merry

It's Front Porch Fun Day here on the LBH Blog! Today, one of our Front Porch Kit design team members, Rhonda Merry is sharing a super cute Thankful Book she created with our "It's Fall Y'all" Kit! 

Hello, Rhonda Merry here with some Front Porch Kit Fun. 

One of my favorite things to create are mini albums or tag books adorned with fun embellishments.  I admit I have a lot of great packaged items to break into but there is something extra special about making your own. For me it’s not only getting creative but using up the scraps from a project rather than throwing pieces away. Also, using the many stamps, dies and punches I have picked up over the years. 


This little book is titled “We Give Thanks”.  Each page has a little journal area where each of my family members will be able to write in what they are thankful for this year. All of the embellishing was made up from the various scraps and embellies that came inside the “It’s Fall Ya’ll” Front Porch Kit. 

Here’s a look at each page. 


The little pumpkin is made from punching out 3 ovals from the orange patterned paper.  I layered it onto a 1’ chipboard circle to easily adhere the parts.  Punched a little leaf sprig and free handed a cork stem. I inked the edges if each oval and the leave with coordinating inks.  Once all of the pieces in place to form your pumpkin and the glue is dried, adhere to your page, card or tag.
  
                I used various dies to cut fall images from the cork sheet included in the FPK. 


So if you would like to get embellishing, go through your stash, find those general shapes (circles squares, ovals, or labels) gather the stamps with foliage, Thanks Yous and journal lines plus some specialty shapes like stars, hearts, fall themed, etc. and start punching and stamping away with your Front Porch Kit.

Enjoy!

Rhonda Merry

I hope you enjoyed Rhonda's tutorial today!
Tune in every week for another Front Porch Fun Day!! 

This Front Porch Kit is still available...Check out "It's Fall Yall" by clicking HERE!  Keep Creating!


Wednesday, January 28, 2015

Designer Spotlight: Susan Liles & Rhonda Merry

Welcome friends!!!
I hope you have enjoyed following our Blog and getting to know more about all our great LBH Gals! Today, we are shining the Spotlight on two awesome team members... Susan Liles and Rhonda Merry. These gals do so much for the LBH!  If you don't find them behind the counter,then they are working like busy bees designing projects for Workshops or creations for our Media Team and our Front Porch Kits!
----------------------------------------------------------------------------------------
 Designer Spotlight: Susan Liles


Hi, Susan Liles here! I'm a lifelong crafter who started with drawing and painting, entering projects into the Houston Livestock Show and Rodeo (and winning) back when I was just a kid.  I've tried just about everything when it comes to crafting--sketching, drawing, watercolor, tole painting, leather crafting, beadwork, sewing (doll clothes and home decor to an expensive wedding gown), embroidery, calligraphy, and oh my gosh, who remembers latch-hooking?!?!  Well, today I find myself pretty content in the "papery" world of stamping, cardmaking, Copic coloring, scrapbooking and DIY home decorating/repurposing projects (which I hope to do even more of this year). 


I'm thrilled to be on the Media Team for The Little Blue House.  Not only am I on this team, but if you come to the store, you'll also find my design work in the Front Porch and some Buffet Kits, I teach the Reverse Confetti ('Fetti Fans) Card Workshops, and you'll also find me behind the register, making sure y'all get your crafty supplies all bought and ready to take home to love! 


I was born in Houston and have lived in the North Texas area for most of my life, making my way through the banking industry for 18 years.  My family and I took a leap of faith 11 years ago and I became a stay-at-home mom, taking care of our 3 girls.  During that time, I kept busy with them and did design work for several companies over the years, including several of the major online stamp companies, some in-house design work for Michael's, and a few other little side jobs along the way.  I'm beyond blessed to say that I've finally found my "crafty home" with The Little Blue House and I couldn't be happier about it!
My style tends to be graphic, and layer-y, but I also love to dabble with a scrubby vintage look or even shabby-chic with a "more is more" attitude.  I love bright colors, too!  I think the one thing I've heard from others over and over about my work is that it always looks fun and happy, so if that's a style...it must be mine!

Right now, I'm loving all my Reverse Confetti stamps and dies (of course).  I think everyone will agree that "foam boosters" are my product of choice. I really love the dimension it gives to my projects.  I have to have back up to my back up supply with them! I'm also a collector of anything Heidi Swapp, and am always on the lookout for anything dog related, paper or stamp-wise (We have a puggle named Sage that I dearly love.  I'm sure you'll see her on my layouts in the near future).  
I truly look forward to not only inspiring you, but also hearing from you!  Find me on my blog, susiestampalot.com, and I'd love for you to follow me on Instagram, Facebook, Twitter, Pinterest and on Splitcoaststampers.com as well (susiestampalot).   

_____________________________________________________________________


Designer Spotlight: Rhonda Merry


Hello LBH friends.  Rhonda Merry here. It’s my turn to be featured here on the Little Blue House Blog and for those who know me, know that I’m a “behind the scenes” kind of person in that I help manage the daily happenings at the Little Blue House; check out, reservations, paperwork, inventories and the like.  But I also venture out with my creativity and design for Front Porch Kits and LBH Bundle Kits.  I have worked at the LBH since opening in September 2010 and have watched our little business grow to the amazing place that it is today.
 I am the wife of a great guy, Chet, who allows me my creative outlet without with little ridicule. I am Mom to three young adults. One with his own career in California and two living the college life.  I’m not sure if I can officially be called an empty nester, yet, since I “custody  share” the care of my Mom, who is at an age of needed assistance but not quite at the stage of needing full time professional care. So my sister and I have made room for her in our homes for this season. 
I have been a scrapbooker since high school, but only realized what that meant about 14 years ago when I went to my first Creative Memories party. Now I dabble in everything paper related, I still mainly Scrapbook. 12x12 layouts and pocket pages, you will find both in my personal albums.

My style varies.  I will create vintage, modern, linear, mixed media, layered, whatever moves me at the moment.  My personal scrapbooks have everything from simple to detailed, minimal to festive.  I love trying new techniques, although if there are too many steps or too many supplies needed, I will usually not repeat it.  But I love that I know how it works and that helps in knowing my product and the Little Blue House. I also enjoy making mini albums.  Smash books or from scratch.  I seem to have a growing collection…

My favorite crafty item is buttons.  The love of buttons started when I was a kid. My family would go to my Aunt Helen’s who had this bowl of trinket toys and buttons setting on her kitchen bar. I can remember us kids digging through that bowl every visit.  That along with my mom being the family seamstress, set me up for my love of buttons. Getting to pick out the ones that would go on whatever new outfit she would make for us, that was the best.  My favorite are the mother of Pearl or crystal buttons from the 30’s and 40’s. Even when shopping for clothes, if there are interesting buttons on it, I will usually buy the item. 
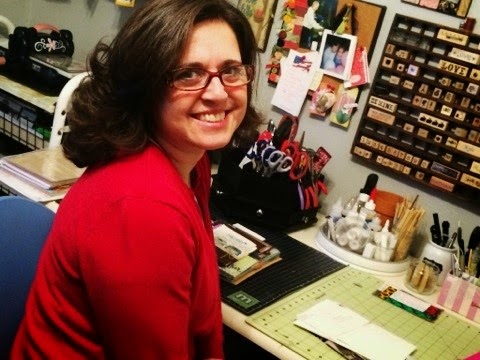
Here is where I create.  After my 2nd kid left for college, I took a room for myself.  Most of the time I will have paper clippings and unused embellishments, stamps and inks, and multiple scissors scattering the tabletops while creating. Once complete everything gets put away. I call it setting back to ZERO. I have set to Zero for this blog post because the insanity of clutter is disturbing to too many for that to ever be seen on the web. LOL
I know only few can appreciate the fullness of this space, but
It makes me happy to be in here.  I can see potential in every tool and paper
 I have. But even if the walls were blank, I could see the potential in that as well.
You can follow my blog at www.NOidlehandshere.blogspot.com ; my Instagram under rmerry1 or on search Rhonda Merry on Pinterest. There I post my creations for the current kits and bundles for the LBH, along with a new venture for me, Faith Journaling.  A recent workshop at the LBH with Shanna Noel on what Faith Journaling is all about has me reading my bible more frequently.  Keeping my mom on the weekends sometimes means I miss going to church and this is a way to encourage myself to bible study time.  Faithfulness and art, it’s all good!
Thanks for stopping by and reading what I write and creating with me
I hope to see you at the Little Blue House.
Make it a creative day!Rhonda
___________________________________________________________________

Thanks to Susan and Rhonda for sharing with us! We love them so much and the LBH wouldn't be the same without them. Thanks for reading and we hope to see you in the HouSe this week! 

So much going on...Come get inspired at the Little Blue House!

Saturday, November 22, 2014

The Little Blue House 12 Days of Ornaments: Day #8


Hello and Welcome to Day #8 of the Little Blue House feature...

Rhonda Merry here to tell you about my ornament.
 Bell Jars are fun way to make your collectibles and special items
stand out when decorating for the holidays.  I used a beautiful glass bell
ornament from Melissa Frances to display a cute little paper snowman.


Snowman Bell Ornament By: Rhonda Merry

Supplies:
One Bell Jar Ornament by Melissa Frances.
White Cardstock, 
Christmas Greens Pipe Cleaner, 
Bakers Twine
Tiny Jingle Bells, 
Pruners, Small twigs for arms
Gold Metallic Paint(Dazzling Metallic Champagne Gold)
Artificial Snow, 
Perfect Pearls Mist
Gold cording, 
Hot Glue gun, Hot Glue sticks, 
Glossy Accents, 
E6000
Wire cutters, 
¾” circle Punch 
1-1/4” Circle Punch


First, paint the base of your ornament.  I used
Dazzling Metallics Champagne Gold.  Set aside to dry.


Then, dry brush a 3” section of the Christmas Greens Pipe Cleaner with
 the gold paint. We want to add the gold highlights to soften the green color.
Allow to dry. We will use this to make a small wreath.

Next, punch TEN 1-1/4” circles. One circle will
be a base for the snowman to stand level,  the rest are folded
 in half to make lower part of  body. 
And NINE 3/4" circles for the head.

Using Glossy Accents, glue circles together keeping
the fold to the inside middle as shown.

Glue body to base with the hot glue and hold level until glue hardens.
 Repeat step for head  and  adhere to body using hot glue.

Next, cut the painted 3 inch piece of the Christmas Greens Pipe cleaner
 and form into circle for a  wreath. Bend to make ends meet and secure
 with hot glue. Make a bow with the twine. (I used a Pinterest trick using a fork
 to make this tiny bow.  Worked like a charm). Top the bow with the tiny jingle bell.


HINT: I turned my jingle bells red, using Red Pepper Alcohol Ink,
by placing bells in a zip top with a few drops of the alcohol ink. Shake,
remove and let dry. But a silver or gold jingle bell will work beautifully here too.


Cut about a 6” length of twine for scarf.  Wrap around neck twice and
 tie to hide glue. Leave ends loose until we get the arms on and situated. 
Use pruners to cut two twigs for arms.  Twigs should be about 1” long.
We may need to trim more to fit in bell glass.

Once arms are in place, see how the scarf falls. If it will drape naturally
 in a place touching the snowman or the twig, place a dot of glue
 there to hold for when we add the snow. Trim ends of scarf.

Once the arms are secure, position wreath on arm opposite
 of your scarf tails and secure with a small dot of hot glue.

Now to test before sealing!
Before securing Snowman to bell base, check to make sure
arms are short enough for bell to cover. Prune as needed.
Center Bell on base and see where snowman sets. Glue
snowman in that spot for best fit using the E6000.


Using about a tablespoon of snow, place in top of bell. 


Check to see if level is right by placing
snowman base over bell and...


 flip right side up.

Remember, this is not yet glued down.

Add or remove snow if the amount doesn't look right.
But, if all looks good...

flip bell again and add a line of E6000
 around the bottom of glass bell.

HINT: Have a rag or paper towel handy in case the E6000 wants
to blob out of tube. Mine usually does.  I did not have my rag handy
so my blobs went onto the back of my hand until I was done.
That's the Rhonda Merry way!

Now to cover snowman with the bell, this is not a test.
Position the snowman over bell as in test and center.
Close and Flip right side up, give a slow twist of the bell to have the
loop hanger at top of bell positioned in a way that our hanger will allow
snowman to face forward when hanging on the tree.

Remember, do not lift bell from base. You can
 turn slowly and still have a good adhesion.  The E6000 takes
few hours to dry so you have time to position glass.

Once the glass is in place, run your finger around the glass bottom
to smooth out any bubbles of glue that are on the outside of bell.


Add a hanger and let dry completely
before hanging on your tree.


Playing with the Faux Snow is more my speed. But Snow Days
can be so beautiful. It's always fun to see the kids building snowman during a
snow day.  Leave a comment and tell me about your favorite snow day game?
You will have a chance to win my Bell Jar Snowman.

Thank you for following along.

Rhonda Merry

CONGRATULATIONS to the DAY #7 WINNER:

BlessedinTexas

Please contact the LBH to claim your ornament