Showing posts with label hand made ornaments. Show all posts

Saturday, November 22, 2014

The Little Blue House 12 Days of Ornaments: Day #8


Hello and Welcome to Day #8 of the Little Blue House feature...

Rhonda Merry here to tell you about my ornament.
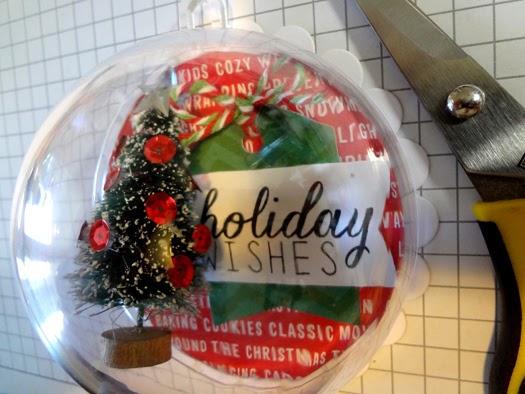
 Bell Jars are fun way to make your collectibles and special items
stand out when decorating for the holidays.  I used a beautiful glass bell
ornament from Melissa Frances to display a cute little paper snowman.


Snowman Bell Ornament By: Rhonda Merry

Supplies:
One Bell Jar Ornament by Melissa Frances.
White Cardstock, 
Christmas Greens Pipe Cleaner, 
Bakers Twine
Tiny Jingle Bells, 
Pruners, Small twigs for arms
Gold Metallic Paint(Dazzling Metallic Champagne Gold)
Artificial Snow, 
Perfect Pearls Mist
Gold cording, 
Hot Glue gun, Hot Glue sticks, 
Glossy Accents, 
E6000
Wire cutters, 
¾” circle Punch 
1-1/4” Circle Punch


First, paint the base of your ornament.  I used
Dazzling Metallics Champagne Gold.  Set aside to dry.


Then, dry brush a 3” section of the Christmas Greens Pipe Cleaner with
 the gold paint. We want to add the gold highlights to soften the green color.
Allow to dry. We will use this to make a small wreath.

Next, punch TEN 1-1/4” circles. One circle will
be a base for the snowman to stand level,  the rest are folded
 in half to make lower part of  body. 
And NINE 3/4" circles for the head.

Using Glossy Accents, glue circles together keeping
the fold to the inside middle as shown.

Glue body to base with the hot glue and hold level until glue hardens.
 Repeat step for head  and  adhere to body using hot glue.

Next, cut the painted 3 inch piece of the Christmas Greens Pipe cleaner
 and form into circle for a  wreath. Bend to make ends meet and secure
 with hot glue. Make a bow with the twine. (I used a Pinterest trick using a fork
 to make this tiny bow.  Worked like a charm). Top the bow with the tiny jingle bell.


HINT: I turned my jingle bells red, using Red Pepper Alcohol Ink,
by placing bells in a zip top with a few drops of the alcohol ink. Shake,
remove and let dry. But a silver or gold jingle bell will work beautifully here too.


Cut about a 6” length of twine for scarf.  Wrap around neck twice and
 tie to hide glue. Leave ends loose until we get the arms on and situated. 
Use pruners to cut two twigs for arms.  Twigs should be about 1” long.
We may need to trim more to fit in bell glass.

Once arms are in place, see how the scarf falls. If it will drape naturally
 in a place touching the snowman or the twig, place a dot of glue
 there to hold for when we add the snow. Trim ends of scarf.

Once the arms are secure, position wreath on arm opposite
 of your scarf tails and secure with a small dot of hot glue.

Now to test before sealing!
Before securing Snowman to bell base, check to make sure
arms are short enough for bell to cover. Prune as needed.
Center Bell on base and see where snowman sets. Glue
snowman in that spot for best fit using the E6000.


Using about a tablespoon of snow, place in top of bell. 


Check to see if level is right by placing
snowman base over bell and...


 flip right side up.

Remember, this is not yet glued down.

Add or remove snow if the amount doesn't look right.
But, if all looks good...

flip bell again and add a line of E6000
 around the bottom of glass bell.

HINT: Have a rag or paper towel handy in case the E6000 wants
to blob out of tube. Mine usually does.  I did not have my rag handy
so my blobs went onto the back of my hand until I was done.
That's the Rhonda Merry way!

Now to cover snowman with the bell, this is not a test.
Position the snowman over bell as in test and center.
Close and Flip right side up, give a slow twist of the bell to have the
loop hanger at top of bell positioned in a way that our hanger will allow
snowman to face forward when hanging on the tree.

Remember, do not lift bell from base. You can
 turn slowly and still have a good adhesion.  The E6000 takes
few hours to dry so you have time to position glass.

Once the glass is in place, run your finger around the glass bottom
to smooth out any bubbles of glue that are on the outside of bell.


Add a hanger and let dry completely
before hanging on your tree.


Playing with the Faux Snow is more my speed. But Snow Days
can be so beautiful. It's always fun to see the kids building snowman during a
snow day.  Leave a comment and tell me about your favorite snow day game?
You will have a chance to win my Bell Jar Snowman.

Thank you for following along.

Rhonda Merry

CONGRATULATIONS to the DAY #7 WINNER:

BlessedinTexas

Please contact the LBH to claim your ornament

Wednesday, November 19, 2014

The Little Blue House 12 Days of Ornaments: Day #5


Hey Ornament Makers....Nat (the 2nd 1/2 of The Blue Crew) here with a fun and simple paper frame ornament. I'm not going to lie....I instantly felt the pressure when I was asked to design an ornament for this 12 day feature. Have you seen the LBH Ornaments in the past? A lot of talent to live up to. So, THANK YOU Miss Tracy and the LBH girls for including me in this fun feature.
 Let's get to it, shall we?
Paper Frame Ornament

My ornament features fun, paper frames that are available with lots of paper collections. I'm designing with frames by Fancy Pants Designs - the Oh Deer Collection.


Gather N Get:
1 FPD paper frame from the "Oh Deer" collection
 (I used the "It's the most Wonderful Time of the year" frame)
Reverse Confetti Dies: Circle Garland, Tagged Tote (I used the tiny bow), Oh My Stars
Die Cut tree (I used a tree from Silhouette Design #50884)
Coordinating papers - 1 for frame background, 1 for back of ornament/frame,
1 for bow/Christmas Tree
Scrap of yellow paper for star
White Cardstock for Circle Garland die
Wink of Stella in Silver
Queen & Co Pearls in "Berry Red" and "Shamrock Green"
Yellow Stickles
Glitter gel pens
Liquid adhesive, ATG gun, pop dots, paper trimmer
1/16" hole punch
Red paper twine

Let's Make It:
The measurements in this tutorial are specific to the frame I used. If you use a different frame, you will need to cut your papers specific to that size.
Die cut 3 Circle Garland and "paint" with Silver Wink of Stella. Use a heat gun to dry and "paint" with another coat. This will give a stronger metallic look. Heat set again with your heat gun and set aside.

Die cut the middle size star from the "Oh My Stars" RC die from your scrap of yellow paper. Embellish your tree with varying sizes of red pearls and the die cut star. Apply yellow stickles to the star and set aside to dry.

Place your frame face side down and place your garland (silver side down) in a "zig zag" pattern. You will have trim off excess garland that overlaps the frame. Apply glue to the ends of the garland and secure to frame.
Cut a 2 1/2" x 3 1/2" of coordinating paper. I used the grey tonal polka dot pattern from a 6x6 FPD "Oh Deer" paper pad. With your ATG gun, apply adhesive on the very edge of the FRONT side of the paper. Make sure the tape is as close to the edge as possible as you don't want the tape to show through on the frame. Adhere the paper to the frame.
Now, to cover up your work on the backside of the frame, cut a coordinating piece of paper (I used the solid red from the same paper collection) just shy of 3" x 4 1/2". Adhere paper to back of the frame

From the same paper that you cut your tree (or any other coordinating paper), die cut the tiny bow from the RC "Tagged Tote" die. Apply glue to the center of the bow and adhere to the top center of your frame. Adhere a large green pearl to the center.
Use pop dots to secure your tree in the center of the frame and on top of the sparkly garland.
Using your hole punch, punch two holes at the top of your ornament for your hanger. Run red paper twine through the holes and tie a knot to secure at the holes. I love the look of the knots on the front side of the frame...gives it a little bit of rustic character.
Add a little doodling/shimmer to the sentiment and bottom of the frame with the glitter gel pens to finish the ornament. 


Thanks so much for joining me today and letting me share my Paper Frame Ornament. Don't forget to comment below for your chance to WIN this ornament to add to your tree this year! I'd love to hear how you decorate your tree at the holidays......is your tree a variety of ornaments collected through the years? Are you a solid bulb ornament tree decorator? Personally, we have a variety of ornaments....I love decorating the tree each year and remembering the stories that surround each ornament.

Merry Crafting!!!
Nat

CONGRATULATIONS to the DAY #4 WINNER:
Debbie Kahler

Please contact the LBH to claim your ornament

Saturday, November 15, 2014

The Little Blue House 12 Days of Ornaments: Day #1

Well, it's me, Susan Liles here (your resident LBH Reverse Confetti specialist) and I'm thrilled (and just a little horrified as the newbie) to be kicking off this year's Twelve Days of Ornaments event!  Beginning today, we will feature a unique, hand-made ornament and a full tutorial so that you can easily re-create an ornament for yourself and others...and YOU will have a chance to WIN that day's featured ornament by simply leaving a comment. One lucky commenter will be randomly chosen each day!

Let's dive right into the holiday festivities with Ornament #1 
Holiday Wishes Dome Shaker Ornament

For this project, you will need:
Clear plastic dome
Patterned paper-2 coordinating patterns
White Card Shoppe cardstock
Small bottlebrush Christmas tree
Seasonal Sentiments stamp set (Reverse Confetti)
Tag Me Confetti Cuts (Reverse Confetti)
North Pole Wishes Confetti Cuts (Reverse Confetti)
Black ink
Foam snow
Scallop Circle die to fit outside of dome edge
Sequins or similar tree embellishments
Star embellishment for tree
Twine/Ribbons/Trims
Used dryer sheet
Hot Glue
Tape Runner or ATG gun
Fabri-tac or Beacon 3-in-1 glue (or similar)

Putting it together:

Trace around edge of dome onto patterned paper to be the backing of your dome and cut out.  Cut two and one will be for the back of the ornament.  (You may have a circle die that will work for this.)  Cut the scallop circle from the white cardstock.  Adhere with tape runner or ATG gun (liquid glue will warp backing...it needs to be super flat. Don't ask me how I know this. LOL!)

Die cut tag from coordinating patterned paper.  Die cut 2 holly leaves and berry from patterned paper and set aside.  Stamp "Holiday Wishes" sentiment onto white cardstock with black ink.  Cut down and flag end each side close to wording.

Decorate the Christmas tree as desired using hot glue.  I used the star embellishment for the top and red sequins as tree ornaments.

Place all pieces onto paper circle backing and decide on placement, making sure it all fits flat and nothing sticks out the side of the dome. 


Adhere all pieces to the circle backing using tape runner/ATG for the tag and sentiment, and hot glue for the tree. 

Use the used dryer sheet to wipe down the plastic dome completely inside and out. This reduces static for the foam snow.

Turn dome over like a bowl and add foam snow (approx. 2 teaspoons).

Hold palm of hand over back and hold upward to see if more or less is needed, keeping in mind about where the tree and tag will be once the backing is attached.

Use Fabri-tac or Beacon 3-in-1 glue and carefully attach completed backing to dome, making sure the plastic loop of the dome is stationed at the top of your ornament and that the foam snow stays at the bottom of the dome. DO NOT DRY FLAT--Let it dry semi-vertical so that the foam snow doesn't stick to the glue around the inside edges.  Once dry, check for openings and apply more glue if necessary around the dome on the outside.  Let dry completely.  (I did mine overnight.)


Add twine or skinny ribbon to outside edge of dome to conceal glue.  Loop a separate piece of twine or ribbon through ornament's top hole and tie for a hanger. 

Tie ribbons separately into a bow, and attach with hot glue at the top. Adorn with star trim, paper holly, berry and sequin.  Using tape runner or ATG gun, adhere 2nd circle to back of ornament. 


That's it!  And hey, don't forget that you can WIN one of these that I've already made, because I created 2--one for me and one for you!  Just leave a comment on this post and tell us what your favorite holiday treat is.  Miss Tracy will randomly pick a winner and they will be announced on our Day #2 Ornament post coming your way tomorrow--a joint collaboration from Lynette Chiles and Miss Tracy herself!

Merry Crafting!
Susan

Thursday, November 13, 2014

12 Days of Ornaments begins this Saturday, Nov.15th

We are so excited to begin our 5th annual
12 Days of Ornaments Blog Feature
this Saturday, Nov 15th!

This is our early Christmas gift to you, our fabulous customers! 
Image

Beginning Sat. Nov 15th, we will be featuring a full step by step tutorial of a unique, hand-made ornament. We will feature a NEW ornament tutorial each day for 12 days in a row!!! Then, on  Thanksgiving Day, Nov. 27th, we will post a recap of ALL 12 Ornaments
for you to Enjoy and Re-create!

We hope that you will craft along with us and trim your tree in hand-made style!!! We will have items in stock at the
Little Blue House for you to re-create your
favorite ornaments each day!

You will also have a chance to WIN an ornament each day! Simply leave a comment on each daily post and one lucky commenter will be chosen each day to take home that specific ornament!

Join us and let's make it the best Hand-made Holiday ever! All the featured ornaments will be on display on our Christmas Tree at the Little Blue House!

Be sure to become a follower TODAY on the LBH Blog to ensure you don't miss out on this Holly Jolly free tutorials!!!

www.thelittlebluehouseblog.blogspot.com
Merry Crafting,
Miss Tracy