Monday, November 30, 2015

12 Days of Ornaments Recap and a Winner!

Thank you for following our 12 Days of Ornaments Blog Series!
Here is a Recap of all our Ornaments


Day 6- Christmas Cheer Clip Up Ornament by Kristyn McElroy
http://www.thelittlebluehouseblog.blogspot.com/2015/11/12-days-of-ornaments-day-6.html


Day 7- Photo Transfer Snowflake Ornament by Nadine Carlier
http://www.thelittlebluehouseblog.blogspot.com/2015/11/12-days-of-ornaments-day-7.html


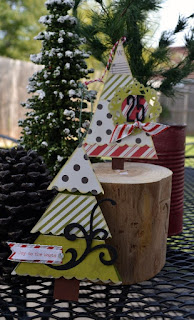
Day 8- Golden Burlap Clip Up Tree Ornament by Valerie Bishop
http://www.thelittlebluehouseblog.blogspot.com/2015/11/12-days-of-ornaments-day-8.html


Day 12- Altered Paint Brush by Lynette Chiles  http://www.thelittlebluehouseblog.blogspot.com/2015/11/12-days-of-ornaments-day-12.html

Our Winner for the Santa Altered Paint Brush is....
Denise Bryant!!!
Contact the LBH to Claim your Ornament!


Merry Christmas and Happy Crafting,
LBH Gals


Wednesday, November 25, 2015

12 Days of Ornaments - Day #12


Welcome to our Final Day of 12 Days of Ornaments 2015!!!
Today Lynette is sharing her handmade altered paintbrush ornaments!
 
Santa Altered Paintbrush Ornament
designed by Lynette Chiles

Santa Supplies Needed:

2” Natural Bristle Paintbrush
½ Yard White Sparkle Wireless Chenille
½ Yard White Eyelash YarnOne White Sparkle
¾” Pom Pom12” RibbonOne Holly ClusterRed,
White, and Black Acrylic Paint
Fired Brick Distress Paint
12” Red and White Baker’s Twine
Hot Glue Gun and Glue Sticks
Diamond Stickles


Let's Create!
1.       Sand the writing from the brush handle so that it does not show through the paint.
2.       Paint the handle with red acrylic paint, the two small wooden dots, black for the eyes, and the larger wooden dot with fired brick Distress Paint.
3.       Attaching with hot glue, add the white sparkle wireless chenille.

 
4.       Attach white eyelash yarn in between rows of chenille with hot glue.


5.       Attach white sparkle pom pom with hot glue where the hole is in the handle of the brush. After the glue has dried, attach red and white bakers twine around the pom pom and tie a knot, come up several more inches and tie another knot, creating the hanger.

 
6.       Add the features, holly, and bow with hot glue, referring to the photo for placement.
7.       Paint white paint on the bristles of the brush to make beard. Optional: Apply Diamond Stickles over painted beard to add sparkle.

 ----------------------------------------------------------------------------------------------------------------

Angel Paintbrush Ornament
designed by Lynette Chiles


Additional Supplies Needed:

One 2” natural Bristle Brush
Sand Paper
One Wood Skinny Stick (Cut in half)
One Wooden 1 ½” Circle
Four Small Muslin or Burlap Flowers
6” Lace and 6” Beaded Twine
12” White and Gold Twine
Two Diecut Butterflies or Metal Wings
Black Fine tip Permanent Journaling Pen
            Cream Acrylic Paint
             Worn Lipstick Distress Paint
         Diamond Stickles
2” Glitter Snowflake with Hanger
Hot Glue Gun and Glue Sticks
Scotch Tacky Glue
1.       Attach wooden circle to the handle of the paintbrush at the top, with Scotch Tacky Glue.
2.       Cut wood skinny stick in half. On straight end, cut at an angle with highest point on the  outside. Attach with Scotch Tacky Glue.

 
3.       Paint handle, arms, and head with cream acrylic paint. Paint hands and cheeks with Worn Lipstick Distress Paint.
4.       Draw features with Black Fine Tip Permanent Journaling Pen.
5.       Attach with hot glue the sparkle 2” snowflake on the back of her head.
6.       Wrap white and gold Baker’s Twine just under head several times and tie in a bow in the front.
7.       Attach beaded trim where metal begins on the brush and attach lace trim below beaded trim with hot glue.
8.       Attach two diecut butterflies together at their bodies. Attach to the center back of the handle just below twine wrap.
9.       Attach one of the small flowers to the center of the wings.
10.   Apply Diamond Stickles to the bristles of the brush.
11.   Attach three small flowers at the top of her head, one in the center and one on each side of the center, overlapping a small amount and folding in half while gluing in place.
Lynette has put together some Altered Santa & Angel Paint Brush Ornament Kits for YOU!
If you are interested in purchases a kit please come by or contact the LBH! Limited Supply Available
Cost: $7.50 a kit
 
Here is another altered Angel Paint Brush option you can create...
 
1.       Before attaching arms, attach 9” strips of lace, trim, and ribbons. Knot the trims near the ends.
2.       Metal wings were used on this angel.
3.       Attach painted arms over lace.

-------------------------------------------------------------------------------------------------------------
I hope you enjoyed today's Ornament and all the Ornaments we have shown you over these last 12 Days!!
If you missed any of our ornaments from this blog series check back tomorrow for our 12 Days of Ornaments Re-cap!!!

It's time to reveal the winner of Day 11's Ornament...
Lucky Winner is....
ANGIE GRIMM
Congratulations! Contact the LBH to Claim your Ornament!

Be sure to leave a comment below to be entered in to WIN today's Santa Altered Paint Brush Ornament!
-Comment below telling us what is your favorite thing to do over the Holiday Season-  

Tuesday, November 24, 2015

12 Days of Ornaments: Day #11

Hello Friends!

Miss Tracy here...Welcome back to another great hand-made Ornament Tutorial! It is Day #11 of our 12 Days of Ornaments Blog Feature....can't believe how fast the days have flown by! 

Today I have a special Ornie to share with you! Most of you know that I L-O-V-E to repurpose things and one of my recent projects inspired the ornament I am sharing with you today. On Sun. 12/6 and on Wed. 12/9, I will be holding a Shutter Snowman Workshop at the Little Blue House. Look how adorable these Frosty Friends are....


I had "snow" much fun making these cuties that I decided to replicate them in a miniature size! Introducing my Miniature Snowman Shutter Ornaments!!! 


I have always been fond of Snowmen so these will be the perfect addition to my Christmas Tree! 

Here are the items you will need to create your own Snowman Ornaments: 

1 Miniature Shutter
Small Popsicle Stick
White and Black Paint
small piece of Orange Cardstock
Ribbon or Fabric for Scarf
Twine & Pom
Black dots or jewels for eyes
Hot Glue
Diamond Stickles
Glossy Accents
Black Chalk Ink or Distress Ink


**We are selling this Ornament as a KIT at the Little Blue House ...AND...this Saturday 11/28 is Small Business Saturday...We will be offering Mini "Make It" Sessions where you can come to the LBH and create one in class with me! We are scheduling 30 minute sessions beginning at 10:30am and running through 1:30pm. Cost is $5 and that covers everything you need to make your Snowman Ornament. You can call ahead to the LBH to reserve your time slot. Available only while supplies last. Hope you can come join in the fun!!!

Miss Tracy's "How To":

1. Paint your miniature shutter with white paint. Set aside to dry or speed up the process by using your heat tool to dry the paint. 

2. Cut the rounded edges off of your popsicle stick. Paint Black (back and front). Paint black onto the top portion of your shutter. This portion will be your hat.  Set aside to dry or dry with your heat tool.

3. Using hot glue, attach the hat brim to the shutter as shown. 
4. Lightly apply Diamond Stickles over the white part of the Snowman Shutter. Swipe across with your finger. 

5. Cut a Carrot Nose from your Orange Cardstock. Ink the edges with black ink. Glue as desired onto shutter. I used a dot of hot glue to attach. 
6. Attach his Eyes of Coal using a drop of Glossy Accents. 

7. Cut a piece of ribbon (about 10 inches). This could be fabric if you desire. Wrap ribbon around the Snowman Shutter and tie off...don't actually knot it, just kind of overlap it and secure it in place with a dot of hot glue. Trim the tails at desired lengths. 
8. Embellish his hat with some twine and a pom or whatever else you would like to use. 

9. Attach the ornament hanger to the back of the Snowman's head using hot glue. 

10. Add some glossy accents over his nose and set aside to dry. 

11. Hang on your tree....and enjoy! 


Don't these little guys just melt your heart??!??!! If you would like to WIN one of my Snowman Shutter Ornaments, please post a comment here. One lucky commenter will be chosen to WIN and announced on tomorrow's post.  


Share with me one of your favorite activities to do in the Winter. I hope you enjoy this tutorial and will stop by and see us on Small Business Saturday, 11/28. Thanks for reading!!!
Come back and see us tomorrow for our final Ornament!

Keep Creating!
Miss Tracy :) 

Congratulations to AshleyH !!! You are the WINNER of Day #10's Ornament. Please call or stop by the LBH to claim your prize. 

Monday, November 23, 2015

12 Days of Ornaments Day #10

12 Days of Ornaments: Day #10

Welcome back and thank you for joining us! 
Today we are sharing an LBH Ornament which was featured earlier this year at our "Little Somethings Workshop" Christmas Event!

This ornament features something we all LOVE.....Printed Paper!!! Take a look at our Pretty Paper Ornament...

Pretty Paper Ornament 
designed by Susan Tidwell


These ornaments are so quick and easy to create simply using varying sizes of printed paper cut into strips. We chose to embellish ours with a snowflake in the center. You could add this using a die cut, punch, or it could be an embellishment that you have in your stash. Our snowflake was cut  using the Silhouette.


Here are the supplies you will need:
Cropadile or other Hole Punch,  Ribbon & Twine
Snowflake or Die-cut of your choice
Printed Paper - Double-sided prints work best
Scor-Tape and a Liquid Glue such as Scotch Tacky Glue
Something for the center of your snowflake- could be sequins, button, pearls, enamel dots, or bling.
   
 Putting it Together:
1.Separate strips according to size. You will have 2 small, 2 medium, 2 large, and 2 extra-large. 


Small- 1  inch wide by 5  inch long  

Medium- 1 inch wide by 5 1/2 inch long 

Large- 1 inch wide by 6 inch long 

Extra Large- 1 inch wide by 7 inch long 


2. Glue the 2 small strips together with like patterns together. This will be the center strip.

3. Add tape to both ends of one side, lining tape up close to ends. 

4. Attach 1 medium strip to this piece. Repeat with next largest strip, and so on... (Note: the patterns can alternate or all face the same direction. If the pattern is directional, be sure that all strips go in same direction.)


5. Repeat attaching remaining paper strips to other side, keeping same order.

6. Punch hole in top of ornament. Thread baker’s twine through hole and knot ends together for a hanger. Thread ribbon through hole and tie in a knot. Trim ends if needed.

7. Attach snowflakes on each side, gluing the center vertical spoke of each snowflake to the edge of the center paper strip.

8. Glue small pearl or glitter dot to each sequin and then to center of each snowflake.
We have a few Pretty Paper Ornament kits still available...
Stop by the LBH to pick one up or Order Online right 
HERE!  

Want to Win this Pretty Paper Ornament??
Leave a Comment below telling us your favorite
Christmas Movie! 

Check back tomorrow to see if you are a Winner!!


We have a lucky winner for our
 Day #9 Ornament... Our Winner is... gardeningmom

Congratulations!! Contact the LBH to claim your Ornament!


Thank you for joining us today! We hope you enjoy making lots of Pretty Paper Ornaments for your tree this year!!

See you tomorrow for another great ornament tutorial!